
How to Use AutoGPT | How much does it cost?
In the digital age, the concept of AI-powered agents is no longer just a product of science fiction. Today, we’ll introduce you to the easiest way to deploy your AutoGPT, a revolutionary method to reach your goals more efficiently.
This ingenious AI technique involves you stating a goal, followed by one instance of ChatGPT, and creating a comprehensive plan to achieve it. After that, your AutoGPT executes all the outlined steps. And the best part? The process is more straightforward than you think.
AutoGPT is still new and it is expected to evolve in the coming weeks and months. Therefore, I’ve also provided a step-by-step guide below, which will be updated promptly whenever there are changes. So, without further ado, let’s dive in!
Step 1: Access the OpenAI Platform
Your first step, and a perennial one, is to navigate to platform.openai.com. Simply log in with the same account you’ve used for ChatGPT here.
-
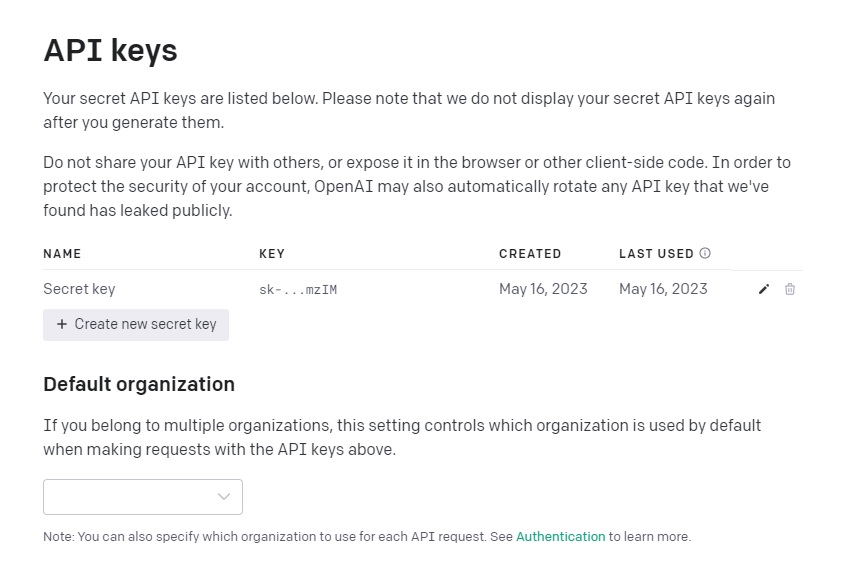
View API Keys
- Next, click your profile in the top right corner and select “View API Keys.”
- An API is a straightforward means of connecting one application to another.
-
Create a New Secret Key
- Click “Create new secret key,” assign it a name, and create your secret key.
- This key will be directly linked to your account, meaning any future applications will be customized for you.
- Remember to keep this critical confidential to prevent unauthorized access to your account.
Step 2: Deploying the GPT-Powered Agent
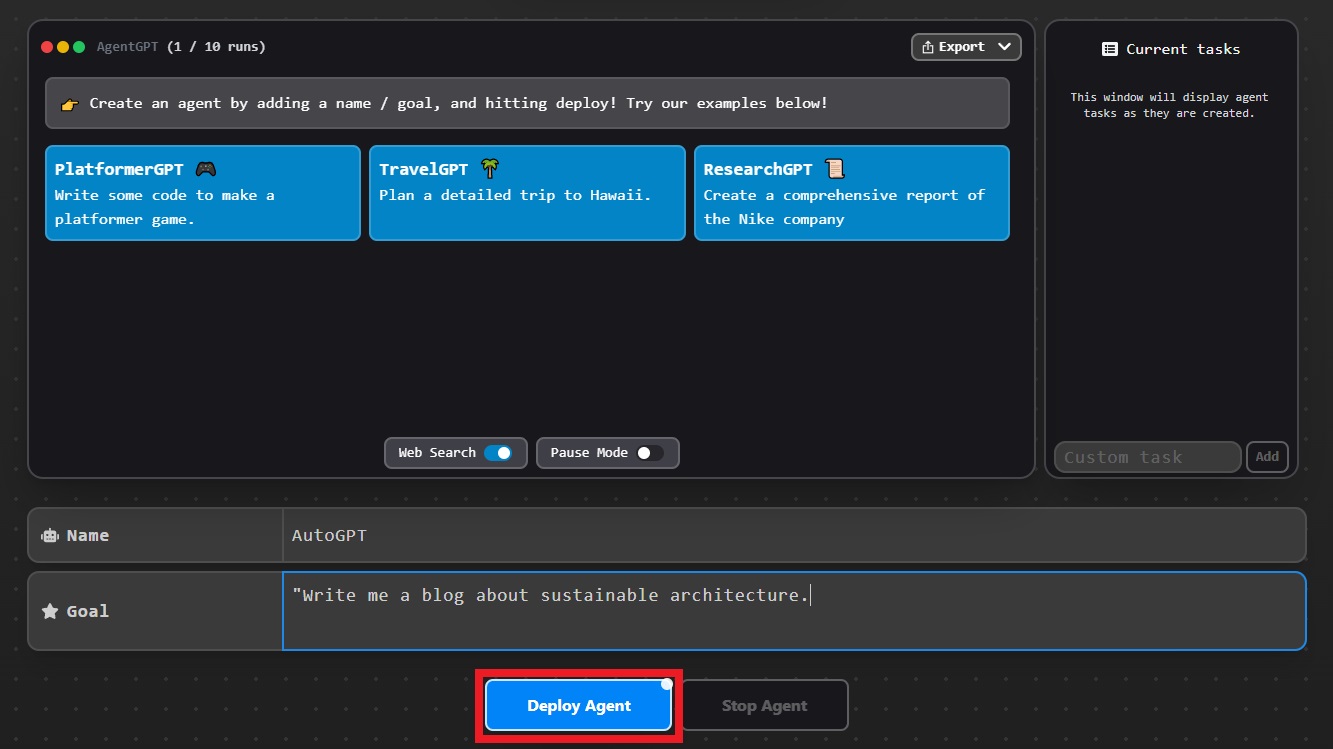
Having copied your key, navigate to AutoGPT, a user-friendly web interface that enables us to deploy a GPT-powered agent. In the settings, paste the copied API key into the designated field. Once done, click “Save.”
-
Naming and Setting Goals
- With the setup complete, you’re almost ready to launch your AutoGPT.
- Start by giving it a name and then set a goal. For instance, “Write me a blog about sustainable architecture.”
-
- Click “Deploy agent” and watch as ChatGPT devises a sequence of tasks to achieve this goal.
- You’ll be able to monitor these tasks, such as “Retrieve relevant academic sources,” “Analyze data,” and “Generate a comprehensive research paper,” on your screen.
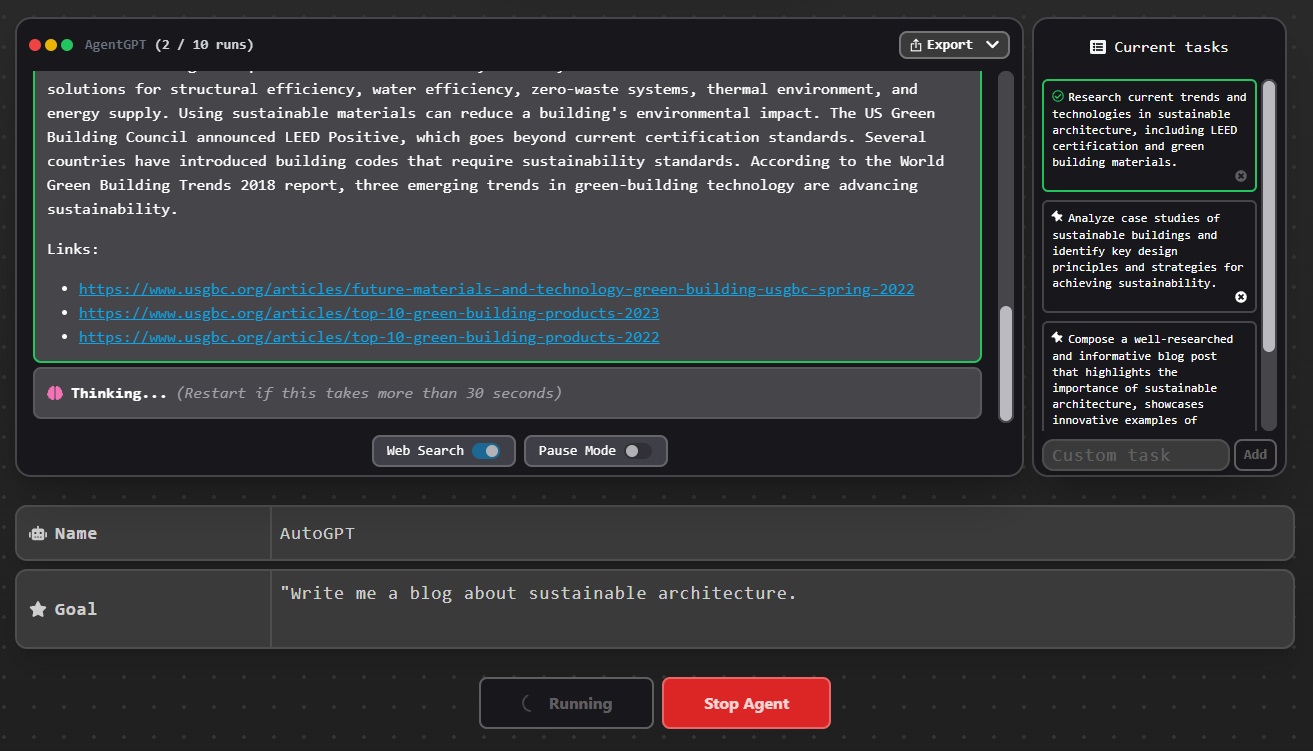
Step 3: Let Your Agent Work
Now, all you have to do is sit back and let your AutoGPT work its magic. You’ll notice that after completing the initial tasks, it starts drafting your research paper section by section. Once completed, hit “Copy” on the top right corner and paste the results into a new document.
What About the Cost?
- While using your API key isn’t entirely free, OpenAI provides some complimentary credits to get you started.
- Reviewing the usage data, deploying an AutoGPT for 25 messages costs 5 to 10 cents with the GPT 3.5 Turbo model. You can find more detailed information and prices on the official OpenAI website.
While the browser version of this tool is indeed user-friendly, it’s just a glimpse of what’s truly possible with autonomous agents. We can expect even more sophisticated functionalities to emerge as we move forward.
For more content, stay with us, here at Spiel Times. Make sure you subscribe to our push notifications and never miss an update. You can also follow us on Twitter, Instagram, and YouTube. Until next time!
Matteo Marcelino
Born with a passion for video games, I have been a fan of the medium for as long as I can remember. From playing Mortal Kombat and getting frustrated whenever I lost, to exploring the worlds of RPGs and action-adventure, video games have always been a source of my entertainment. Aside from gaming, I have also been passionate about photography since high school. Whether capturing the beauty of nature or the emotions of people, I find great satisfaction in capturing moments through the lens of their camera. In addition to these pursuits, I also found an unexpected love for writing. Initially never intending to pursue this skill, I discovered writing as a means of escape and creative expression. With a growing passion for storytelling, I now find myself diving deeper into the world of writing, exploring new genres and styles to share my unique perspective with the world.
View all articles