Valorant: VAN 1067 Error – Easy Fix
The Valorant Community is being tortured by a new Error Code. VAN 1067 is a relatively new code that has arrived in the hands of many players when they changed their Windows OS, as Windows has disabled key features that Valorant needed to function. We’ll teach you how to fix the VAN 1067 Error Code in Valorant in this article.
The VAN 1067 Problem Code is a relatively new error that arose after players upgraded from Windows 10 to 11. Your OS’s BIOS settings are the source of the problem. The options for resolving this problem are shown below.
VAN 1067 Fix List
First and foremost, players must check that all drivers are correctly installed and updated to the most recent version. If not, players must first update those.
Fix #0 (Startup)
- Deactivate automatic startup of programs
- If you have Discord installed, you may need to disable it so that it does not start automatically.
Fix #1 (Windows 10)
- One of the ways to fix this is to revert to Windows 10 or contact Riot Support. By going to the Recovery Options menu in the System Settings menu and selecting ‘go back to earlier build’ when requested, you can restore to Windows 10.
RELATED: Valorant FIX: Invalid Access to Memory Location Error
Fix #2 (Step-by-Step)
Screengrab Courtesy of Teconz via YouTube
- Enable TPM 2.0
- To access BIOS on startup, you’ll first need to totally shut down your computer. You can accomplish this by pressing F2 or DEL during the startup process of your computer.
- Go into Advanced Mode from here and look for the ‘Security’ or ‘Miscellaneous’ option. You’ll want to seek for the Intel Platform Trust Technology (IPTT) or AMD CPU fTPM option once you’re inside. You’ll need to enable one of these, depending on the CPU you’re using.
- Secure boot
- After you’ve activated this setting, you’ll need to enable Secure Boot on your PC. Look for ‘Windows OS Configurations’ or ‘Boot options’ in the same set of menus to find this.
- When you’ve located one of these, check for the ‘Secure Boot’ option and switch to UEFI mode in your BIOS. Enable Secure Boot, and you should be able to restart the VGC service. After you’ve completed the steps above, restart your computer and log in as usual.
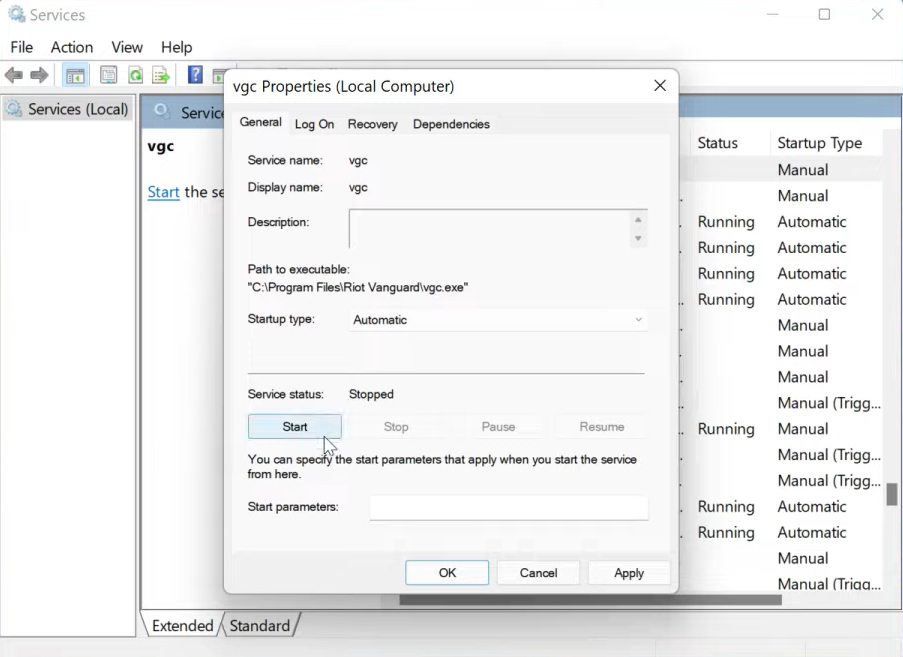
- Enable VGC Service
- Press Windows Key + R and type Services.msc into the text box that appears. Find a service named ‘vgc’ and start it from the right-click menu.
RELATED: Valorant: Packet Loss Error, How To Fix
If you have any questions regarding Valorant, feel free to ask in the comments below. For more content, stay with us, here at Spiel Times.
Make sure you also subscribe to our push-notifications and never miss an update from the world of video games. Follow us on Twitter @spieltimes for the latest PS5 restock and drop. Until next time, Stay Safe and Happy Gaming!
Jhimlerry Lacap
Loves to play DotA, LoL, and ML. Finished almost all FF series and enjoys playing MMORPG. Jhimlerry is also a former vocalist/bassist of a local band in the Philippines.
View all articlesRelated Articles
View All
Grand Theft Auto VI Pricing and Pre-Orders Finally Revealed
Rockstar Games has ended months of speculation by confirming the official price and pre-order plans for Grand Theft Auto VI....

Grand Theft Auto VI Pre-Orders Open Amid Rising Scam Alerts Online
Rockstar Games has confirmed that Grand Theft Auto VI pre-orders will begin on June 25, 2026. The announcement arrives as...

Major Game Reveals and Surprise Returns Headline Summer Game Fest 2026
Big reveals, unexpected comebacks, and plenty of new trailers made Summer Game Fest 2026 a busy night for fans. If...